Showing posts with label club. Show all posts

Wednesday, September 7, 2011

September Club Projects

This month we are using the "Gently Falling" stamp set (Wood #123802/Clear #123804) from the Holiday Mini Catalog. I LOVE it!!! We're also using the Spice Cake Designer Series Paper (#124003) which is seriously my FAVORITE!!! I love the color combination they used. I would have never put them all together like Stampin' Up! did, but I'm sure glad they did! :)

Inspired by Kristi Thompson.

It's hard to see but I used some of the new Early Expresso Quilted Satin Ribbon (#124104), also from the Holiday Mini Catalog.
Here is a sneak peak of the Bonus project we'll be making for those in attendance on Saturday.

Let me know if you'd like to try out my club. You can either place a $25 order and get the projects for free, or pay $7 for the projects, it's up to you. I hope to see you there! It's this Saturday (9/10) from 1-4pm at my house.

Monday, August 8, 2011

August Club Projects

If you want to try out stamp club let me know. Club is held the 2nd Saturday of every month from 1-4pm at my house. Below are the projects we'll be making this Saturday.
I used the Summer Fun stamp set (SU#123042) out of the Summer Mini Catalog. The colors I used were: Melon Mambo, Tempting Turquoise, Lucky Limeade, Pumpkin Pie, Pacific Point, Black Stazon, Pretty in Pink (striped grosgrain ribbon SU#119775). I used Designer Series Paper from the Brights Collection (SU#117155) and the hostess paper Cheerful Treat (SU#122381).
To watercolor the people, ice cream/popcicles, and flip flops I used the Brights and Neutrals Watercolor Wonder Crayons (SU#119804, 119805), a Real Red, Melon Mambo, Tempting Turquoise, Daffodil Delight & Pacific Point Stampin' Write Marker, and Crystal Effects (SU#101055) to make the tubes, popcicles/cones, and flops pop up. You can see the Mini Brads (SU#122941) in the Decorative Label (SU#120907) finished off with a sponge (SU#: 101610) in Pacific Point classic ink (111837), and a green Rhinestone Brad (SU#109111) in the middle of the pinwheel.

July Club Projects

For the 12 x 12 spread we used the Pennant Parade (SU# 122742) and the new Petite Pennants Builder punch (SU#122361) out of the new Idea Book & Catalog. I also used the Simple Letters Alphabet (SU#115960) & Tasteful Trim (SU#120893) dies in my Big Shot (SU#113439). The colors I used are: Poppy Parade, Night of Navy, Marina Mist, and Whisper White. The string is the white baker's twine (SU#124262) and the red ribbon is the Poppy Parade Stiched-Poly Ribbon (SU#119263).

Here is the card we made using the Summer Splash stamp set (SU #123037) out of the Summer Mini Catalog. The colors I used are: Pumpkin Pie, Lucky Limeade, Daffodil Delight, Melon Mambo, and Whisper White. I also used the Melon Mambo embossing powder (SU#123223), Versamark ink pad (SU# 102283), Heat Tool (SU #10005), Frost White Shimmer Paint (SU# 116854) to make the shimmer spray, 1 3/4" circle punch (SU# 119850), and the Circles #2 die (SU#114526).

This is the card opened. I know you can't really see it but the white circle behind the octopus has been misted with shimmer spray. It's very shimmery!

Sunday, June 12, 2011

June Club Projects

I used a tutorial found HERE to make my "magic slider card". I tweaked it just a little and voila.


I think it turned out pretty cute!

I got the idea for our pages on a Stampin' Up! Demonstrator site. I tweaked it just a bit and got the pages you see above.

I will post supply lists at a later time.

May Club Projects

Please forgive the quality of these images and the posts to come. I've misplaced my camera and so I'm using the camera on my phone.

Supply Lists are on their way!


Wednesday, April 20, 2011

April Club Projects

Supplies:

Pear Pizzazz cardstock
Peach Parfait cardstock
Watercolor paper
Black Stazon ink pad
Poppy Parade, Daffodile Delight, Peach Parfait, Wild Wasabi Stampin' Write Markers
2-Way Glue Pen
Dazzling Diamonds Glitter
Aqua Painters
Word Window Punch
Teeny Tiny Wishes Stamp Set
Awash with Flowers Stamp Set
Perfect Polka Dots Embossing Folder
Sizzix Big Shot
Supplies:
Pink Pirouette cardstock
Pear Pizzazz cardstock
Poppy Parade cardstock
So Saffron cardstock
Concord Crush cardstock
Designer Series Paper Pack (Level 1 hostess set-Stampin' Up!)
Simple Letters Alphabet dies (4 pack)
Extra Large Oval Punch
Both Large Oval Punch sizes
Owl Punch
2 1/2" Circle Punch
Sponge
Pink Pirouette classic ink pad


I sponged around each of the white parts of the bunny except for the whites of the eyes to give him a little texture.

Tuesday, March 15, 2011

March Club Projects

Card

I got the idea for this card from a gal in my Stampin' Up! group when I attended a shoebox swap last month. I'm not sure the name of the girl but thanks!
Supplies (all items are from Stampin' Up!):
Peach Parfait cardstock (card base)
Daffodil Delight cardstock (moon)
Chocolate Chip cardstock (owl body)
Kraft cardstock (eyes)
Whisper White cardstock (eyes)
Basic Black cardstock (eyes)
Sunny Garden Designer Series Paper
Hemp Twine
Real Red 5/8" grosgrain ribbon
Real Red brad
So Happy For You stamp set (from the Sale-a-Bration catalog)
Bravo Burgandy classic ink pad
2 1/2" circle punch
owl punch
heart to heart punch
12 x 12 pages
Supplies:
Chocolate Chip cardstock and ink pad
Baja Breeze cardstock and ink pad
Poppy Parade cardstock and ink pad
So Saffron cardstock and ink pad
Whisper White cardstock and craft ink pad
Button, Button stamp set
Sizzix Big Shot
Simple Serif Alphabet dies
1 3/4" circle punch
Circle scissor plus (5 1/2" circle)
White Taffeta 3/8" ribbon
Sponge daubers
Subtles buttons
Square lattice embossing folder
Perfect Polka Dots embossing folder
Sweet Shoppe Alphabet lowercase
Poppy Parade poly-twill ribbon

Closer view of the upper left of the left page.
The bottom left of the left page.
The middle left of the 2nd page.

New Technique

I'm not sure of the name of this technique but for this tutorial I will call it ink debossing.

Ink up the raised bumps of the square lattice embossing folder with the Whisper White craft ink pad.
Place circles on the inked side of the folder.
Carefully close the folder.Run the folder through the Big Shot.


Carefully remove the circles without smudging them on the ink left over on the folder and VOILA! It's inked and debossed!

TIP: This works well on darker colored cardstocks. I tried this using the perfect polka dots folder and the So Saffron cardstock but it didnt' show up well.

Sunday, February 13, 2011

February Club Projects

So, I really into a birthday theme this month so I skipped V-day and went straight to birthday. We did make a V-day card in our January club so we had some LOVE going on...but I am in LOVE with the Sale-a-Bration Designer Series Paper and Accent Elements pack, and the coordinating ribbon and buttons.

I could have made my own tutorials, but why reinvent the wheel. So I've put links to other ladies tutorials to teach you how to do some of the techniques used.

Quilted Card

Diana Gibbs Quilted Card Tutorial

Becky Jensen's Heat and Stick Powder Tutorial (used fo rthe brackets)

BONUS PROJECT
Once in a while I do a 3-D project to showcase what our box dies can do.

DeAnn Rauzi Petal Cone Box Tutorial

Lisa Flemming Scallop Circle Accordion Flowers Tutorial

January Club Projects

Scratch'N'Sniff Card
Well, I cannot find my card we made...but lets face it...I didn't look very hard so I just made a template on My Digital Studio. The only thing missing is the gretting/element that goes on the Whisper White square.

Supplies needed (all items are from Stampin' Up!):
Concord Crush cardstock
Real Red cardstock
Whisper White Cardstock
Blushing Bride Designer Series Paper (level 1 hostess set)
Island Floral Sizzix Die
Clear embossing powder
Sugar free drink mix (MUST BE SUGAR FREE OR SUGAR WILL SCORTCH)
Love You Much stamp set
A mini silver brad
1/4" Whisper White grosgrain ribbon
Black Stazon ink pad
Stampin' Write markers--Blushing Bride, Wild Wasabi
Versamark ink pad
Heat gun

Since you can't see the sentiment I used I'll describe it.
  1. I stamped the LOVE (with a flower on top) in the middle then colored the love using the blushing bride marker. I colored the stem and leaf using the Wild Wasabi marker.
  2. Die cut the smallest flower on the Island Floral die.
  3. Smoosh it on the versamark pad then sprinkle with clear embossing powder/drink mixture (I use about 50/50 of each powder, mix well, then use as you would embossing powder). Heat it until the powder goes a little dark and looks wet. Now you have a scratch'n'sniff card!
  4. Put mini silver brad through the hole in the middle of the die cut flower and poke it through the flower on the Love sentiment. This will cover the flower from the stamp and it will be replaced with the scratch'n'sniff flower.

12 x 12 Winter Pages

Supplies needed:
Marina Mist cardstock
Whisper White cardstock
Night of Navy cardstock
1 1/4" striped Night of Navy ribbon
1 pewter build a brad
Serene Snowflakes stamp set
Silver shimmer paint
Marina Mist classic ink pad
Night of Navy classic ink pad
Pearls
Defined Alphabet greeting (I used "delight")
Dimensionals
1/2", 1 3/4" and 1 3/8" Circle punches
Sticky Strip
Alphabet Simple Letters Sizzix die set
Sponge daubers
Circles #2 Sizzix die
Blender pens

Use sponge daubers to ink stamps with silver shimmer paint and to daub the paint all over the 1/2" x 12" strips, and the Winter. Those pieces were cut out in Whisper White then painted silver with the daubers.

Left side:
  • Stamp a variety of snowflakes in shimmer paint on the left side of the page.
  • Stamp Whisper White strip using Night of Navy ink and the set of three snowflakes.
  • Large Whisper White 2 1/2", stamp the largest snowflake in Marina Mist then use the blender pens to color in the diamond shapes.
  • Small Whisper White 1/2" (used on the build a brad)
  • Night of Navy 1 3/8", stamp 2nd smallest snowflake in silver shimmer paint and add a pearl to the middle
Use sticky strip to gather the ribbon and add three pearls vertically after the gathering.


Right Side:

  • Stamp largest snowflake in Night of Navy ink in the bottom left and add pearl to the center.
  • Stamp 2nd largest snowflake on the 2 Whisper White photo mats on the right.
  • Night of Navy 2" circle (die cut, mat for the white snowflake)
  • Whisper White 1 3/8" circle stamped with set of three snowflakes in silver shimmer paint then stamp second to largest snowflake in Night of Navy then add a pearl)
  • Stamp delight definition on strip of Whisper White using Night of Navy ink and make it like a flag, then use a dauber or sponge to sponge around the flag in Marina Mist.
  • Die cut "winter" then use daubers to sponge the letter and 1/2" x 12" strip silver.


Monday, December 13, 2010

Wednesday, October 27, 2010

October Club Projects

Here is the card. The picture is not the best but my battery was dead and my camera was beeping so this is the best I can do for now. The strip at the bottom of the spiderweb under the hat is actually green even though it is very washed out in the pic. I used sticky strip at the bottom of the web to gather the ribbon. I got this idea from elsewhere but forgot who made it. It turned out super cute though.
Supplies:
  • Peach Parfait cardstock
  • Pear Pizzazz cardstock & marker
  • Whisper White cardstock
  • Basic Black cardstock
  • Spiderweb embossing folder
  • Wicked Cool stamp set
  • Black Stazon ink
  • Black lace trim riboon
  • Dimensionals
  • Sticky strip

Here are the pages:
Supplies:
  • Basic Black cardstock & marker
  • Peach Parfait cardstock & marker
  • Concord Crush Cardstock
  • Old Olive 5/8" grosgrain ribbon
  • Small silver brads
  • Fine cozmo glitter
  • Mini glue dots
  • Wicked Cool stamp set
  • Whisper White ink pad
  • Concord Crush ink pad
  • Black Stazon ink pad
  • Sponges
  • Alphabet Simple Letters sizzix dies
  • Decorative label punch
  • Large oval punch
  • 3/4" circle punch
  • 1/16" hole punch or paper piercing tool
  • Sticky Strip
  • Dimensionals
  • Rhinestones (to add a little bling to the witches' shoes)
  • Owl punch (black eye dots)
  • Tasteful Trim sizzix die
For the boots you just wrap sticky strip around the backside of the circle. The red plastic layer makes it lay funky but once you pull it off the sticky strip lays flat. Gather ribbon along the outside sticking it to the sticky strip as you go. Tuck under the ends.


For the glimmer brads use a small brad with mini glue dots stuck to the top. Dip them in glitter and voila! Glimmer brads!


I love this little treat holder. This is what I'm sending with Jade for her preschool Halloween party.
Supplies:
  • Basic Black cardstock
  • Spiderweb embossing folder
  • Word window punch
  • Sticky strip
  • Pixie sticks
  • Concord crush ribbon
  • Peach Parfait cardstock & marker
  • Old Olive marker
  • Whisper White cardstock
  • Dimensionals
  • fine cozmo glitter

September Club Projects

For our 12 x 12 spread I used:

  • Celebrations Designer Series Paper
  • Real Red Cardstock & ink pad & marker
  • Bashful Blue Cardstock & ink pad & marker
  • Whisper White cardstock & 1/4" grosgrain ribbon
  • Pear Pizzazz Ink pad & marker
  • Pear Pizzazz Ribbon
  • Word Play Stamp Set
  • 1 3/4" circle and 2" Circle
  • Dimensionals
  • Sticky strip (to hold down the gathered ribbon)

I made the following easel card using this tutorial: http://www.stampinmoments.com/easel-card-tutorial.html and tweeking it a little to fit my needs.

Supplies (All items are from Stampin' Up! Contact me if you'd like to purchase the products to make this card):
  • Bashful Blue Cardstock & ink pad
  • Old Olive Cardstock & ink pad
  • Whisper White Cardstock
  • Daffodil Delight ink pad
  • Not Quite Navy ink pad
  • Awash with Flowers Stamp Set
  • Defining your Life Stamp Set and Alphabet
  • Pearls
  • Texture plates (sizzix)
  • Scallop boarder punch
  • SNAIL adhesive


Wednesday, September 15, 2010

August Club Projects

We used Make a Monster and Jumble Alphabet stamp sets to complete our pages. Colors we used are the new Poppy Parade, Peach Parfait, returning color Wild Wasabi, Whisper White, and Sahara Sand. I just love how these pages turned out. The monsters were a blast to stamp with!
For our card we used Word Play. It is a fund new stamp set with so much versatility. We also used the new Cork material and a texturez plate with the Big Shot. Super simple yet still super cute! Colors we used were River Rock, Not Quite Navy, and Tangerine Tango.


Thursday, August 12, 2010

July Club Projects

Bug pages are always fun!
Colors used: Pacific Point, Daffodil Delight, Certainly Celery, Pear Pizzazz, Early Expresso

I love the new half rhinestone stickers. They add just the right "bling" to this stamp.
Colors used: Blushing Bride, Concord Crush, Pear Pizzazz

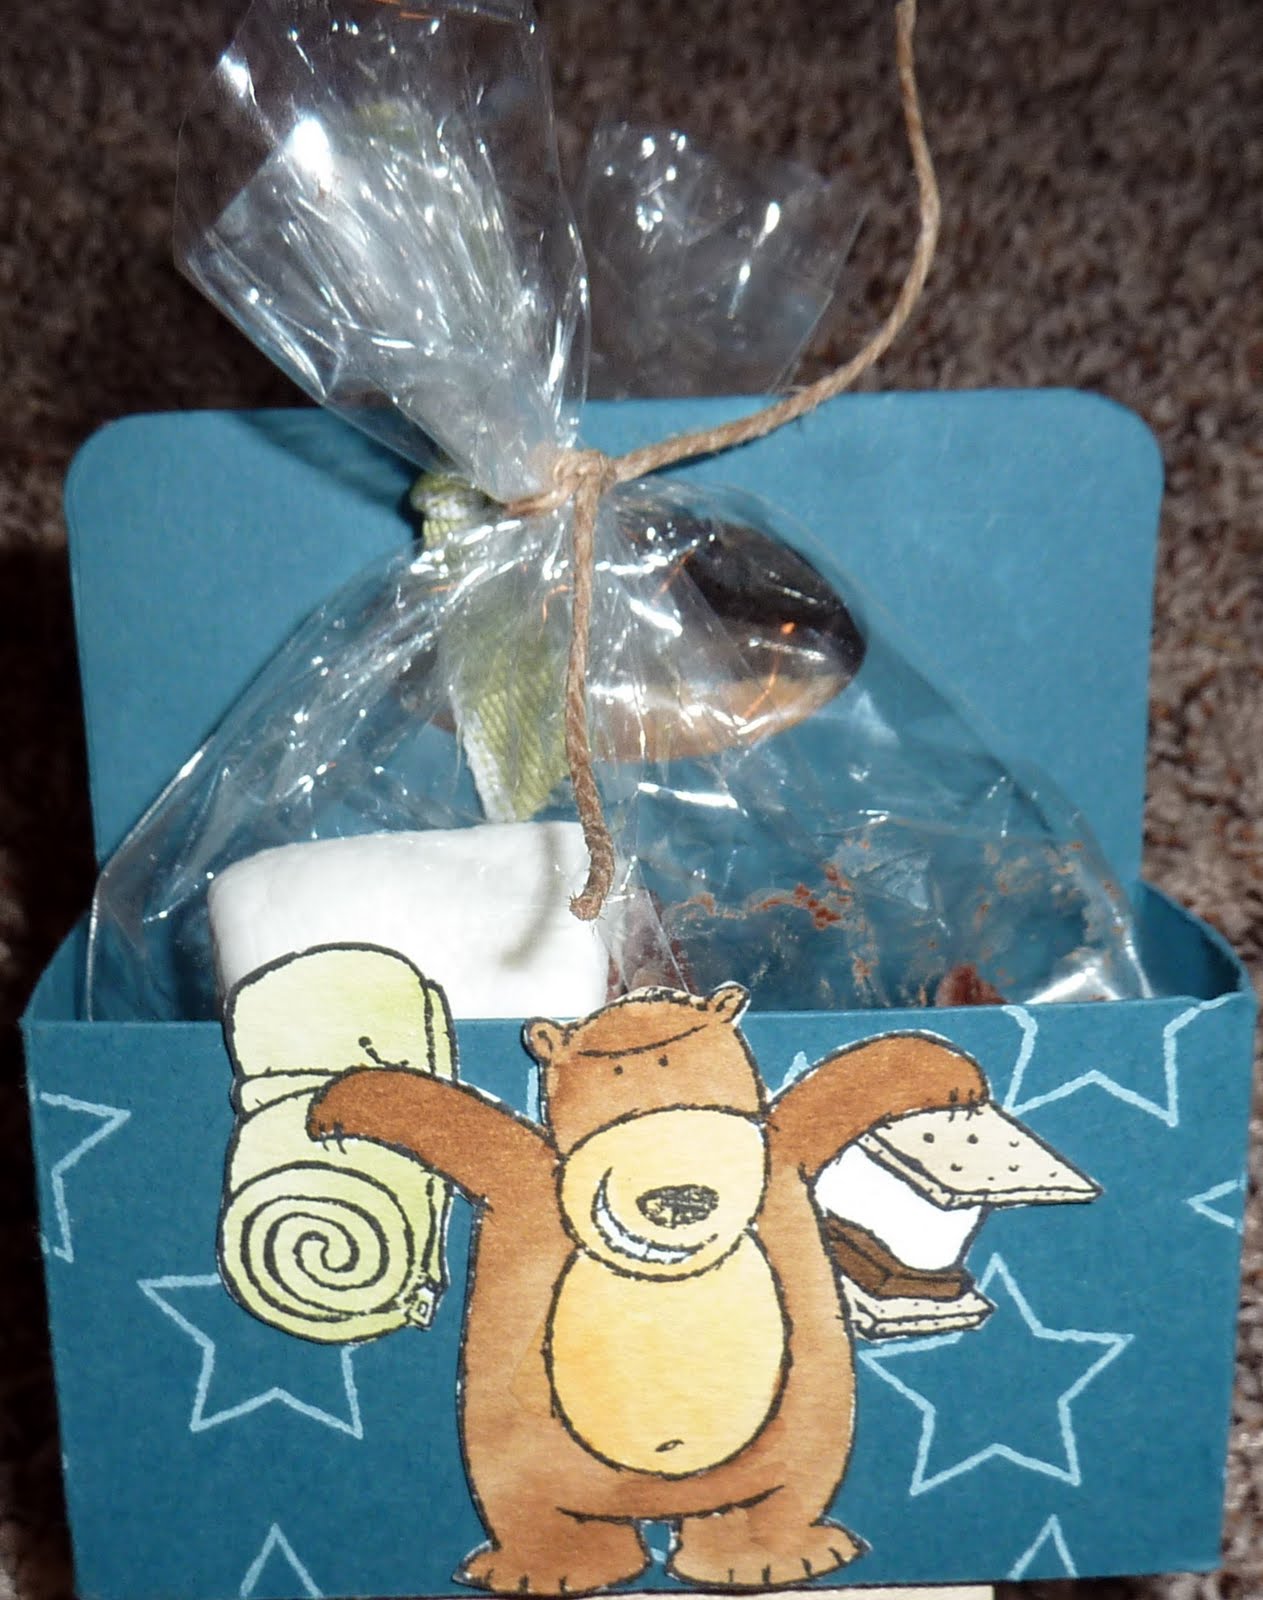
Those that attended our club meeting got to make an extra 3-D project. It is a mini smore holder. I just love that bear!
Colors used: Whisper White, Not Quite Navy, Soft Suede, More mustard, Pear Pizzazz, Crumb Cake, Early Expresso