Sunday, May 31, 2009

Gift Tag Tin 2

If you've ever wondered what to do with your tins after you've used your accents & elements, flower fusions, etc., here is a great way of using every piece of your kit.

First I stamped some flowers from the Garden Greetings stamp set in versamark ink and then onto the tin. I then poured iridecent Ice Embossing powder on the versamark flowers and heated them up. I couldn't figure out the flash thing to make it not glare so much, but you can get the idea.


I will post a pic of this later...for some reason it doesn't want to upload and the battery for my camera is dead. You can see it a little bit in the last pic.


Then I made 5-3" x 3" gift tags and matching stamped envelopes.


I put the gift tags and envelopes inside. They have to stay pretty flat or the tin will not close so do not use too many dimensional objects on these gift tags. I colored some flowers from the Pretties Kit and used a brad to adhere them to the cards.

Lastly, I tied a coordinating ribbon around the outside and added a gift tag. This is a cheap, quick and easy gift all made with supplies on hand.

Thursday, May 28, 2009

June Stamp Club

June 20th at 1:00 pm is the date/time of my next club. If you are interested in checking out the club and making these fun projects, there are two ways to do it. You can put in an order of at least $20 the day of the club, or you can pay $5 for the two projects. I need to know by June 13th if you are going to join us to ensure I have enough supplies.

The first project is a birthday slider card. It is super easy and fun to make. It is also a great surprise for the recepient.

The next project is a 12" x 12" page summer spread. It is versatile and great for those summer pics.
If you are not a scrapbook person, bring your paper trimmer and use the pieces from your kit to make these 4 cards. You will have pieces left over that you can use on cards that you create at home.

At stamp clubs, a group of women places regular orders and rotate hostess benefits. Each person in the group commits to placing a minimum order depending on the number of ladies in the club. Stamp clubs usually meet once a month for as many months as there are members of the club. Here are the two most common types of stamp clubs:
Minimum-purchase club: The amount each member will order each month is typically determined by dividing the minimum order necessary to received hostess benefits ($150) by the number of members in the club. For example, if there are ten in the club, each places a minimum order of $15 before tax, shipping and handling, so the total order can be placed as a workshop.
The hostess benefits rotate with a different person in the group receiving them each time.
If there are only 5-6 of you that would like to join a club, we can do it every month with a $25-$30 minimum with 2 months as a hostess during the year, or we could hold the club every other month with the same minimum purchase, just not as many projects throughout the year.
Product-based club: The club members contribute to the purchase of certain products each month. For example, a club might decide to purchase a set of the Stampin' Write Many Marvelous Markers which costs $125.95. If there are ten people in the club, they would each contribute approximately $13 every month. After ten months, the club would have purchased 10 sets of markers. Each member of the group would receive four markers a month, with one person getting the storage case. This kind of group can be adjusted if the customers want a complete set without waiting a full year or if there are fewer people involved.
Clubs can be customized to your needs. If you'd like to make a 3-D project instead of the card or scrapbook pages, that can be arranged. 3-D projects can be little boxes, gift bags, wall hangings, stationary sets, etc.
Another benefit of a club is you get a new catalog every year for free, a $9.95 value! It is a great time to work on your scrapbooking and make personalized cards to give out. When the year comes to an end, you have a full album that is ready for pictures. If you'd like to check out a club, join a club, or make your own, let me know today.

Tuesday, May 26, 2009

Stampin' Up! Summer Fun Promotion

Dates: June 1-30, 2009

Promotion Details:

The Summer Fun Hostess Bonus Promotion has two parts:

Hostesses who hold a $250-$399.99 workshop will receive an additional $20 in hostess free merchandise dollars!
Hostesses who hold a $400 or more workshop will receive an additional $40 in hostess free merchandise dollars!

So what are you waiting for??? Book a workshop right now for June and get even more free hostess merchandise.
Also, some of the retiring products will be sold up to 50% off. They've never done this before so take advantage of the savings. The "Last Chance Lists" (a.k.a retired lists) will be posted on June 1st, so put in your orders quickly to get the accessories that you want before they are gone. Stamp sets are not sold upon availability so you will be able to get them when you want them until the end of the month.

Sunday, May 24, 2009

June Card Kit

Posted by Picasa


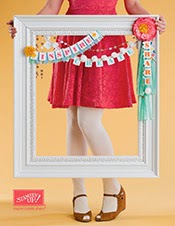
It's card kit time again! You will LOVE these stamp sets and these cards!

In this kit, you'll receive the supplies to create SIX of EACH design shown above - so you will receive all of the consumable supplies that you need to create 12 cards total.

You will also receive 2 additional full color samples of "alternative" cards that you can make with the combined contents of the kit, as well as step by step instructions on how to complete each of the 4 designs.

Card Kit Price is just $15--that's 12 cards, plus envelopes for just $15!

Each month, the card kit also features both a Stamp Set of the Month and an Accessory of the Month. If you purchase the card kit, you may also purchase these items at 20% off!

June Featured Products:
Just Beachy Stamp Set ($25.95) $20.76 with the purchase of the Card Kit
BONUS: Happy Everything Stamp Set ($18.95) $15.16 with the purchase of the Card Kit
Photo Corners Punch ($15.95) $12.76 with the purchase of the Card Kit

What else will you need? See the list below for items that were used to create the cards in this kit. If you already have everything--just buy the card kit and you are ready to create!

If you don't have everything--place a product order with your kit (don't forget about the discount on the "featured products!")

Or--you can use the card kit to create your own designs using other stamps and inks that you already have--the choice is yours!

Orders for the Card Kits must be received by June 10th. You will receive your kits by the end of the month.

Please Note: I am glad to ship kits directly to you! If the kit needs to be shipped, there will be an extra $3 shipping charge.

Email me today to order:
Brenda Smith
brenda@embellishedbydesign.net

If you just want the kit, you can purchase it through PayPal at the bottom of this post.

Products you will need to complete cards as shown:
Bashful Blue Classic Ink Pad ($5.95)*
Brocade Blue Classic Ink Pad ($5.95)*
Real Red Classic Ink Pad ($5.95)*
Summer Sun Classic Ink Pad ($5.95)*

Chocolate Chip Classic Ink Pad ($5.95)*
Kiwi Kiss Classic Ink Pad ($5.95)
Pacific Point Classic Ink Pad ($5.95)
Blender Pens ($9.95)
Paper Snips ($9.95)
SNAIL Adhesive ($6.95)
Bone Folder ($6.95)
Just Beachy ($25.95) $20.76 with purchase of the Card Kit
Happy Everything ($18.95) $15.16 with purchase of the Card Kit
Photo Corners punch ($15.95) $12.76 with purchase of the Card Kit

*You can substitute these ink pads for the markers. The cards will turn out the same.

**You can use any saying and/or alphabet stamp set that you have for the wording and you can substitute "Just Beachy" for any other stamp set that you may have.


    Card Kit Options


    Thursday, May 21, 2009

    Fun with the Pretties Kit

    Here are a few fun new ways to use the flowers in your pretties kit. Don't have one...check out my website: brsmith.stampinup.net

    The first is to color the flower with a marker. Use the brush-like end and color the whole flower, then add a center. It could just be a 1" circle, or you can add the brad for a more finished look. It does take a little while, so if you are making a lot of these flowers, check out the chalk technique.


    Add the flower to a card.

    The next technique is to use a sponge dauber and chalk. If you don't know what a sponge dauber is, it is the black thing on my finger with a sponge on the end. It can be used with ink or chalk. Dab the dauber into the chalk and rub it on the flower until covered with chalk. This is very quick and easy.

    Add a center. It could be a 1" circle, button, brad, or combination of other items. Be creative.

    Then add the flower to a simple card and it gives it a little pizzazz.

    This next technique is one of my favorites! You turn the flower upside down on your versamark pad and push the flower all over until it is saturkeated with versamark ink. The place the flower in your powder pal (helps collect all of the embossing powder and you can easily pour it back into your embossing powder case). Genrously pour on iridecent ice embossing powder. Lift flower and tap off excess powder. Heat with heat tool until shimmery/glossy looking. Don't heat too long or flower smokes a little. Ask me how I know. Add a center and voila. A beautiful embellishment or can be added to a clippie for your girls hair. Just don't make the center out of paper if you add it to a clippie. It is too easy to ruin.

    Add to a simple card and it looks amazing!


    Last, but not least, stamp on the flower. Choose a background stamp such as the one below and ink it well, then stamp on the flower until it is covered. Add a center.


    Add to a card, or a treat/gift box/bag.


    I hope you try some or all of these techniques. They are super fun and versatile and all the while they look amazing.

    Wednesday, May 20, 2009

    Stampin' Up! Retired Sets/Accessories List

    The retired stamp set/accessories list is going to be posted on June 1st. You can order these items up until June 30th and they are gone forever. There will be enough stamp sets to get what you want off the list when you want until June 30th, but the accessories are gone for good when they run out. You may want to check the list on June 1st and place an order through me or online ASAP to ensure you get the items you want before they are gone.


    Also, the Ocassions Mini Catalog runs through June 30th. Check out the catalog to purchase these items before they are gone forever.

    I'm adding a Stampin' Up Special

    May is coming to a close and Stampin' Up! has three specials going on that end on the 31st and I'm going to make the deal even sweeter.

    ***If you place an order through me by the end of the month, I will give you 20% off your order. If you order on my website before the end of the month, I will give you a coupon for 20% of your May order total that you can use on the new catalog and will need to call me to redeem before the end of this year.

    Stampin' Up! Specials:
    • The first is buy 3 packs of Designer Series Paper and/or textured cardstock and receive the 4th pack free.
    • The second special is you can buy a new alphabet set (Jumble Alphabet) for 20% off! Regular price is $43.95 and on sale it is $35.16 from May 1-31. After the 31st, Jumble Alphabet will not be available until July and it will be full price. Check out the Jumble Alphabet link below to see what it looks like. Jumble Alphabet
    • The last is a Scrapbooking Starter Kit. See details below! Promotion Details In celebration of National Scrapbooking Month, join Stampin' Up! as a demonstrator for only $75 with our limited-time Scrapbooking Starter Kit.

    The Scrapbooking Starter Kit contains the following:

    113510 Schoolbook Serif Alphabet stamp set* $42.95

    113059 Simply Scrappin' Petal Party $19.95 108697

    Earth Elements Assorted Textured card stock (12" x 12") $11.95

    105240 Whisper White Craft Stampin' Pad $7.50

    *Substitutable for any stamp set up to $43.95 value.

    Please note: Each of the products listed above may be substituted for like items. Please see the Scrapbooking Starter Kit Order Form for details.The Scrapbooking Starter Kit also contains all the business supplies contained in the standard Starter Kit:

    Getting Started DVD

    Getting Started Guide Guest Invitation Postcard (100)

    Idea Book & Catalog (8)

    Occasions Mini Catalog (8)

    To My Hostess Envelope (10)

    Recruit Folders (5)

    Recruit Brochures (20)

    Hostess Brochure (20)

    Hostess Benefits Form (10)

    Customer Order Form (50)

    If you have ever thought about becoming a demonstrator and already have the most basic supplies, NOW IS THE TIME to join! I will gladly help you get your new business off the ground and show you the wealth of creative ideas that you've always wanted. So if you think you don't have any ideas, there are plenty available to you as a demonstrator to help you in your business. Please contact me ASAP if you have any questions or are interested. I will help you through the process.

    Snickerdoodles

    This is the best recipe I have found yet and I've been dreaming snickerdoodles the past few days. I guess I better make them or it will haunt me until I do. Do any of you have that problem???

    Cream together:
    1 cup shortening (butter flavored is best)or butter
    1 1/2 cups sugar
    2 eggs
    1 tsp. vanilla

    Sift together and add:
    2 3/4 cups flour
    2 tsp. cream of tartar
    1 tsp. baking soda
    1/2 tsp. salt

    Mix well. Use cookie scoop (a must!!!!) and roll in a mixture of cinnamon and sugar or just sugar if you'd like. Bake at 375 degrees for about 10 minutes. Enjoy!

    Tuesday, May 19, 2009

    Birthday Invites/Cards

    I had a blast making invites for the girls' birthday parties this year. Kazia still loves Ariel and Jade is starting to like Elmo. I used my cricut for both invites, but you could always find other alternatives if you need to.

    Instructions:
    • Cut 2 scalloped circles out with a cricut or similar machine out of Real Red cardstock(Dimensions are approximately 4" x 4"). Stampin' Up! carries a die cut similar to this for the big shot.
    • Cut 2-1 3/8" circles out of Basic Grey cardstock and 1 out of More Mustard.
    • Cut 2-1 1/4" circles out of Whisper White cardstock.
    • Cut 2-1/2" circles out of Black cardstock.
    • Cut 1-3" circle out of black cardstock and cut it in half.
    • Cut 1-3 1/2" circle out on a fold. The fold should be about 1 1/4"-1 1/2" long so that it opens up like a card. This is the middle.
    • Cut off top part of the scallops (about 3 scallops worth) to get a straight edge. Align the middle white circle card with the straight edge and adhere front and back scallop.
    • Adhere white to grey and overlap a littl for the eyes and put black pupils in the middle.
    • Attach to card.
    • Add nose and mouth.
    • Add invite/greeting inside card.

    Instructions:
    • Cut out Ariel or other character with cricut using various colors.
    • Cut base of card 4" x 12".
    • Fold at 1" and 6 1/2" so that top overlaps the rest of the card.
    • Adhere Ariel or other character to the flap.
    • Print/Stamp greeting on white cardstock (3 5/8" x 4 1/4") and adhere to the inside of card as shown below.

    Monday, May 18, 2009

    Busy...Busy...Busy!

    Sorry I've been so busy lately and haven't posted. I have been busy making the two projects below along with my daughter's birthday invites. Jade's are finished and Kazia's are in progress tonight. I will post pics and details tomorrow.

    Tag Tin

    I found this cute tin at Roberts for $1.99, again cheaper with a coupon. It makes a cute gift that is cheap and easy without looking like it. Aren't we all looking for a little more bang for our buck and the 25th hour of every day?

    I started out by measureing the bottom of the tin below the lid and cut a strip of paper that would cover the tin and over lap by about 1/2". I used Tombow to adhere the paper to the tin. If you've never heard of Tombow, it is a fantastic adhesive sold by Stampin' Up! or craft stores near you. It works extremely well at sticking paper to things like chipboard and tin. It dries quickly, so make sure you straighten it out quickly and only glue one side at a time. I put my seam on the side seeing as it was that way on the tin itself. I then tied random pieces of ribbon that I had on hand and that matched my paper onto the handle. This took about 3-5 minutes. I added the red ribbon in the middle, and a little element.

    For the tags, I cut 10 strips of white cardstock measuring 2 1/2" x 5" and then folded them to make 2 1/2" square tags. I used the Eight Great Greetings stamp set from the Stampin' Up! Occasions Mini Catalog, markers, scallop circle punch, 1 3/8" and 1 1/4" circle punches, corner rounder, word window punch, and a crop-a-dile (or 1/8" circle punch). I also added a little glitter to most of the cards to add a little shimmer. You could use any set you have on hand and make them all the same, or different. It is up to you. I made 2 each of 5 designs for a total of 10 tags.
    I then cut 8" strips of silver cording and shoved them in the bottom of the tin for the recipient to tie on later. This is what it will look like when tied.

    Stick the 10 tags in the tin on top of the silver cording and your finished. This project can be completed in about 30-45 minutes.

    Incentive Bucket

    I had fun making this little bucket for my Stampin' Up! incentives. It was super easy. I got the bucket from Roberts. It was $3.99, but cheaper with a coupon.

    The can already came in white, so I adhered 5 Stampin' Up! vinyl flowers to the middle of the can. The spacing doesn't have to be perfect. I know mine isn't.

    Then I randomly cut 3"-5" pieces of ribbon, depending on the width (3" for skinny ribbon, up to 5" for the fattest ribbon). Start tying the pieces onto the handle. You do not need to double-knot the ribbon because it will hold once you get a bunch of ribbon on it and scrunch it together. It took a lot more pieces than I thought and took about 35 minutes to tie them all on. Again, super easy but does take a little time. I added a little shredded paper fill the bottom of the bucket, added my incentives and...

    Voila! The finished product. I'm super excited about how cute and how easy it was. This would make a great, cheap gift if I switched out my incentives for something appropriate for the occasion. The only cost out of pocket at the moment was the tin. I used ribbon I already had and I had the shredded paper. If you don't have shredded paper, use paper you have on hand, a paper crinkler, then slice the paper into strips and crumple it up. It only takes a couple of minutes and looks fabulous!


    Tuesday, May 12, 2009

    Ribbon Organizer

    I don't know about you, but I have tried a dozen different ways to organize my ribbon and none have been very effective. I have a lot of Stampin' Up! ribbon and ribbon to make bows and such. I saw a ribbon organizer similar to mine, but I altered it to fit my needs. Lets just say it is much bigger, but I now have room to spare for my trips to Joann's and the Lace Place, and various others. My dad made this for me and it is heavy and sturdy enough to hold its own on a table top or to mount on a wall. I am putting mine on the wall to free up table space.

    Sunday, May 10, 2009

    Shadow Box


    Again, not my idea, but it was too cute that I had to share. This is a shadow box, Designer Series Paper, card stock, a stamp set, rhinestone brad, and taffeta riboon. It is super easy to make and would hang nicely in a any room. You can choose the color scheme, stamp set and accessories that best fits your decor.

    Instructions:
    • Buy a shadow box and accompanying supplies.
    • The mat (pink) cardstock is cut to 8" x 8" with a 4" x 4" hole cut in the middle.
    • Tie the ribbon to the left or right edge of the cardstock.
    • The Designer Series Paper (brown floral) is cut to 4 1/2" x 4 1/2 " and adhered to the back of the cardstock.
    • 2 flowers are stamped, cut, layered, and fastened to the patterned paper with a rhinestone brad (or any fastener of your choice).
    • Stamp a few images on the cardstock and VOILA! Beautiful home decor for a fraction of the price you'd find it anywhere else.

    HINT: Emboss the images around the edges for a more finished look.

    Please visit my Stampin' Up! website for a schedule of upcoming classes or to purchase supplies to make this project.
    http://www.stampinup.net/esuite/home/brsmith/

    Card Kit Club

    Every month I will be releasing a new "Card Kit of the Month." Everyone will have the option of purchasing the kit by the 10th of the month for $15.

    If you think you'll want to purchase these card kits every month, then join the Card Kit Club and SAVE!

    Pre-purchase a 3-month subscription for just $40.50. That is just $13.50 a kit--a $4.50 savings!

    Pre-purchase a 6-month subscription for just $72. That is $12 a kit--an $18 savings!

    Please Note: Unless you live close enough to pick them up from me, there will be a shipping charge of $3 per month added to the total.

    When you purchase a subscription, you will automatically receive the card kit for the months of your subscription. The only time you will need to contact me will be to purchase any add-on items or you can visit my website and make purchases from there.

    If personally know me I will accept cash or check, if not, I accept Paypal.

    When paying for a subscription, please make sure you give a shipping address for me to mail your card kit to, and any other details I may need.


    Card Kit Club Options


    Please visit my Stampin' Up! website for a schedule of upcoming classes or to purchase additional items.
    http://www.stampinup.net/esuite/home/brsmith/

    CD Album

    Sorry the pics aren't great again. I forgot to take pics at home before the album was given away, so I quickly took pics at Grandma's house. I need to schedule more time to play with my camera and find ouy the best settings to use, but hopefully you get the idea. This is a great brag book for your purse. It won't get damaged because of the plastic case and would also make a great gift.

    I started with a CD case and pulled out the inner plastic thing that holds the CD in. I then cut three sheets of paper down to 10 1/2" x 4 3/4" then folded them in half. I trimmed the edges of the inner papers that stuck out to give the book a clean edge. Three pages makes the album bulge a little without many embellishments, I would suggest only using two sheets if you can.

    I removed the lid from the base of the case, took about 15 inches of stretchy silver cording and put it through the middle of my book, through the little holes where the top and bottom of the case connect and tied a bow. Then reattatch the lid.


    Erin is due with a baby soon so I added a pull-out tab to put a pic of the new baby on. If you want to use more than one pic on a page, I suggest getting wallets printed.

    I left the last page empty to add the next Smith family photo.

    Tuesday, May 5, 2009

    From Scrapbook Pages to Cards

    I have two new ladies in my club this year that prefer to make cards. I only found this out shortly before our club last month and I decided to expand the options at my club. I will use the items in their kit for club to create 4 cards instead of the 2- 12 x 12 pages. There will be supplies left over that they are free to create with at home. Here is what I came up with for my May club.

    12 x 12 spread


    The 4 cards (Sorry the pics aren't that great.):


    I cut one of the 12 x 12 papers into thirds (4" wide strips, the folded and cut as needed)


    I cut one 6"x 6" piece out of the remainding 12 x 12 paper and folded in half to make a 3" x 6" card. This gives enough paper for 3 more 3" x 6" cards left, or a ton of 3" x 3" cards.


    You can't see it well in the pic, but I stamped thank you in white ink on the green part below the elephant.


    it opens...


    then opens again.


    This is 4" x 5 1/2" and I folded the front of the card back in half and decorated it.

    It opens to reveal the writing block.


    I hope you have enjoyed changing from scrapbook to card making, or you can take the idea from a card and make a spread...maybe I'll do that in a later post.

    Sunday, May 3, 2009

    Apple Snickers Salad

    I found this great recipe thanks to Chelsee Fuller. I was even able to make it sugar free minus the snickers for Mike and he thought it was the greatest semi-sugar free dessert I've made.

    Ingredients:

    1 cup whipping cream
    1 large box (or two small boxes) instant vanilla pudding
    1 1/2 cup milk
    4-5 granny smith apples
    8 fun size or 4 full size snickers
    Caramel topping (optional)

    Directions:

    Whip the whipping cream. Add pudding and milk. Mix until thick and creamy. Set bowl aside. Dice apples (Peel if desired, but I don't), cut snickers into smaller pieces, then mix apples and snickers into the pudding mix. Dump the mixture into a baking dish and refridgerate for at least 2 hours. Add the caramel topping just before serving.

    Tip:
    Do not add caramel until you are ready to serve the dessert. Believe me, I did and it tasted fine but didn't look good at all.

    Saturday, May 2, 2009

    Chocolate Chip Cookie Recipe


    I have been asked numerous times for my Chocolate Chip cookie recipe. So here it is. I cannot take credit for it. It is from "Grandma's Recipes" which my mom got ahold of while working at Heartstrings over a decade ago. It has some of the most awesome recipes!

    Cream well:
    1 lb. butter (Yeah, that's right 1 pound!)
    2 cups brown sugar
    1 1/2 cups white sugar

    Add:
    3 eggs
    2 TBS. vanilla

    Cream for 4 minutes (Do not skimp on the creaming...it makes a difference!)

    Add:
    6 cups flour
    1 1/2 tsp. salt
    1 1/2 TBS. vanilla

    Blend mixture slowly and thoroughly.

    Add:
    chocolate chips (optional as my daughter would think)
    nuts (optional)

    Bake at 375 degrees for 8-10 minutes.

    Other tips:
    • The cookies will look like they aren't quite finished, but touch the top lightly, if it doesn't move too much, they are done. Also look to see if they are still shiny or not. You will be able to tell when you make them. Shiny is not done. Don't over-bake or they are crunchy. I love soft cookies!

    • I always half the recipe and it always makes plenty.

    • USE A COOKIE SCOOP! This has always made a world of difference in the finished product. It doesn't matter the size of the scoop, but ALWAYS use one.

    Awesome May Specials!!!

    To celebrate National Scrapbooking month, Stampin' Up! has a few specials that start May 1st.

    The first is buy 3 packs of Designer Series Paper and/or textured cardstock and receive the 4th pack free.

    The second special is you can buy a new alphabet set (Jumble Alphabet) for 20% off! Regular price is $43.95 and on sale it is $35.16 from May 1-31. After the 31st, Jumble Alphabet will not be available until July and it will be full price. Check out the Jumble Alphabet link below to see what it looks like.

    Jumble Alphabet

    The last is a Scrapbooking Starter Kit. See details below!

    Promotion Details

    In celebration of National Scrapbooking Month, join Stampin' Up! as a demonstrator for only $75 with our limited-time Scrapbooking Starter Kit.

    The Scrapbooking Starter Kit contains the following:

    113510 Schoolbook Serif Alphabet stamp set* $42.95
    113059 Simply Scrappin' Petal Party $19.95
    108697 Earth Elements Assorted Textured card stock (12" x 12") $11.95
    105240 Whisper White Craft Stampin' Pad $7.50
    *Substitutable for any stamp set up to $43.95 value.


    Please note: Each of the products listed above may be substituted for like items. Please see the Scrapbooking Starter Kit Order Form for details.The Scrapbooking Starter Kit also contains all the business supplies contained in the standard Starter Kit:


    Getting Started DVD
    Getting Started Guide
    Guest Invitation Postcard (100)
    Idea Book & Catalog (8)
    Occasions Mini Catalog (8)
    To My Hostess Envelope (10)
    Recruit Folders (5)
    Recruit Brochures (20)
    Hostess Brochure (20)
    Hostess Benefits Form (10)
    Customer Order Form (50)

    If you have ever thought about becoming a demonstrator and already have the most basic supplies, NOW IS THE TIME to join! I will gladly help you get your new business off the ground and show you the wealth of creative ideas that you've always wanted. So if you think you don't have any ideas, there are plenty available to you as a demonstrator to help you in your business. Please contact me ASAP if you have any questions or are interested. I will help you through the process.


    May Card Kit

    You can now order the card kit of the month!


    The light pink flowers are a little hard to see in the picture, but show up well on the card.


    In this kit, you'll receive the supplies to create SIX of EACH of 2 designs- so you will receive all of the consumable supplies that you need to create 12 cards total.

    You will also receive 2 additional full color samples of "alternative" cards that you can make with the combined contents of the kit, as well as step by step instructions on how to complete each of the 4 designs.

    Card Kit Price is just $15--that's 12 cards, plus envelopes for just $15!

    Each month, the card kit also features both a Stamp Set of the Month and an Accessory of the Month. If you purchase the card kit, you may also purchase these items at 20% off!

    What else will you need? See the list of items that were used to create the cards in this kit. If you already have everything--just buy the card kit and you are ready to create! If you don't have everything--place a product order with your kit (don't forget about the discount on the "featured products!") Or--you can use the card kit to create your own designs using other stamps and inks that you already have--the choice is yours!

    Orders for the Card Kits must be received by May 10th. You will receive your kits by the end of the month.

    Please Note: I am glad to ship kits directly to you! If the kit needs to be shipped, there will be an extra $3 shipping charge.

    Products you will need to complete cards as shown:

    • Basic Grey Classic Ink Pad ($5.95)
    • Kiwi Kiss Classic Ink Pad ($5.95)
    • Pink Pirouette Classic Ink Pad ($5.95)
    • Blender Pens ($9.95)
    • Paper Snips ($9.95)
    • Mini Glue Dots ($4.95)
    • Stampin' Dimensionals ($3.95)
    • SNAIL Adhesive ($6.95)
    • Bone Folder ($6.95)
    • Petal Pizzazz ($32.95) $26.36 with purchase of the Card Kit
    • Button Boquet ($7.95) $6.36 with purchase of the Card Kit
    • Use any saying and/or alpahbet stamp set that you have for the words. I used Jumble Alphabet (on sale in May for $$35.16, regularly $43.95) and Define your Life ($47.95).


    Card Kit Options